Mobile home bathrooms often feel cramped, but they don’t have to stay that way. With smart fixture choices, strategic design decisions, and budget-friendly updates, homeowners can transform their small bathrooms into functional, stylish spaces. Whether you’re tackling a complete overhaul or just refreshing fixtures and finishes, these mobile home bathroom remodel ideas focus on maximizing every square inch while keeping costs manageable. This guide walks through practical solutions, from space-saving layouts to storage tricks, that work specifically for the tight footprints and unique constraints of mobile home bathrooms.
Table of Contents
ToggleKey Takeaways
- Mobile home bathroom remodel ideas prioritize space-saving fixtures like 18–24-inch wall-mounted vanities and corner solutions to maximize the typical 5′ × 8′ footprint without sacrificing storage or functionality.
- Upgrade lighting with LED sconces or brighter ceiling fixtures (4000–5000K), paint with soft, light colors, and swap hardware for under $100 to dramatically transform a cramped bathroom’s appearance and feel.
- Replace aging vinyl or linoleum flooring with waterproof luxury vinyl plank or tile (LVP/LVT) at $2–$5 per square foot to prevent moisture damage while adding durability and visual appeal.
- Install proper ventilation with an exterior-vented exhaust fan, recessed medicine cabinets, and floating shelves to eliminate mold risks and solve storage challenges without consuming precious floor space.
- Cosmetic updates cost $800–$2,500 while mid-range mobile home bathroom remodels with new vanity and flooring run $3,000–$8,000, with long-term savings through low-flow faucets and energy-efficient LED lighting.
- Hire licensed professionals for plumbing and electrical work to ensure code compliance and avoid costly mistakes specific to mobile home systems, while handling demolition and painting yourself to reduce labor costs.
Space-Saving Fixtures and Layouts
Compact Vanities and Corner Solutions
Mobile home bathrooms typically measure 5′ × 8′ or smaller, which means every inch counts. A standard residential vanity runs 30 inches wide, but mobile-friendly options start at 18–24 inches and still provide usable sink and storage space. Look for pedestal sinks if you need maximum floor clearance, they free up visual space and make cleaning easier, though they sacrifice storage underneath.
Wall-mounted vanities are another smart choice. A 24-inch wall-mounted vanity with a single sink leaves room for movement and toilet access without feeling cramped. Pair it with open shelving above for towels and toiletries instead of a bulky medicine cabinet. If you absolutely need cabinetry, consider corner vanities or corner cabinets that use dead space: these fit snugly into corners and won’t interfere with the door swing.
Measure your door opening and doorway width before ordering anything, many mobile homes have narrower bathroom doors (around 24–28 inches), which limits fixture delivery and installation. You may need to remove the door temporarily to get larger pieces into the space.
Efficient Shower and Tub Options
Most mobile bathrooms have a shower/tub combo in a confined alcove. If you’re replacing it, consider a corner shower stall (36″ × 36″ or 32″ × 32″) that saves floor space compared to a tub. Fiberglass and acrylic surrounds are cheap and easy to install, they cost $200–$600 and require just basic plumbing hookups. Real tile looks nicer but demands waterproofing work, grout maintenance, and professional installation.
If you keep a tub for resale appeal, a soaking tub insert or Japanese-style soaking tub can fit the same footprint while feeling more luxurious. For showers, install a frameless glass enclosure (even a small one) instead of a shower curtain: the glass makes the space feel bigger and cleaner, though it costs more upfront ($400–$1,200 installed).
Grab bars aren’t just for elderly users, they’re practical safety features in a mobile home bathroom where the floor can be uneven. Install them at 32–48 inches from the floor following ADA guidelines, and use stainless steel or brushed nickel for a modern look that complements most finishes.
Budget-Friendly Updates With Maximum Impact
Lighting, Paint, and Hardware Swaps
Good lighting transforms a cramped bathroom instantly. Mobile home bathrooms often have a single ceiling fixture, swap it for a vanity-focused setup with sconces on either side of the mirror or a brighter LED ceiling fixture (4000–5000K color temperature). LED bulbs cost a bit more but use 75% less energy and last years longer than incandescent. A basic sconce swap costs $30–$80 per fixture and takes an afternoon.
Paint is the cheapest, fastest win. Choose a light, soft color, pale gray, soft white, or warm beige, to open up the space. Use semi-gloss or satin finish in bathrooms: it resists moisture better than flat paint. Two coats on walls and ceiling run $50–$100 in materials. Prep work (cleaning, patching, primer) matters more than the paint itself, don’t skip it.
Hardware swaps feel disproportionately expensive but cost almost nothing. Replacing cabinet knobs, faucet handles, and towel bars with brushed nickel, matte black, or polished chrome finishes ($2–$10 per piece) updates the whole aesthetic. Pair updated hardware with new caulking around the sink and tub, and the bathroom feels refreshed without major work.
Consider upgrading to a low-flow faucet (2.2 GPM) that reduces water usage and keeps utility costs down, many mobile home owners appreciate lower water bills. Plumbing codes vary by jurisdiction: check local requirements before swapping faucets.
Flooring and Wall Treatments
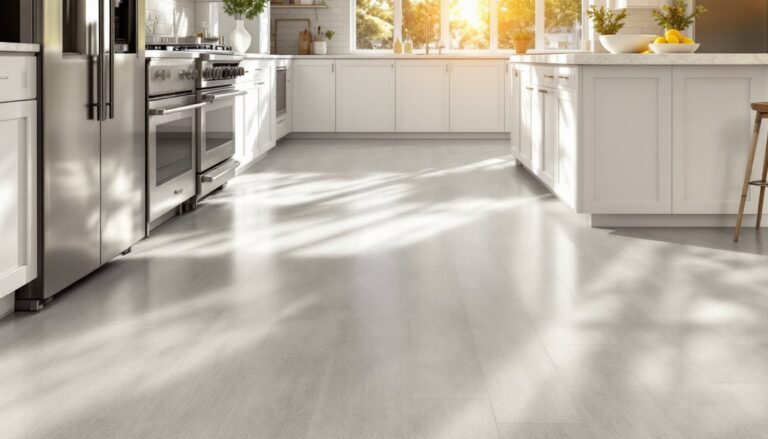
Mobile home bathroom floors are typically vinyl sheet or linoleum, which age poorly and hold moisture. Vinyl plank flooring (LVP) is the go-to replacement, it’s waterproof, durable, costs $2–$5 per square foot installed, and mimics wood or stone convincingly. Lay it over the existing floor after removing fixtures: no expensive subfloor work needed in most cases.
If you want something warmer underfoot, luxury vinyl tiles (LVT) offer better aesthetics and come in larger formats (12″ × 24″) that make rooms look bigger. Both LVP and LVT are DIY-friendly with a miter saw and basic tools, though hiring a pro ensures no gaps or buckling.
For walls, the standard mobile home approach is drywall with tile surround in the shower and vinyl beadboard or standard drywall elsewhere. If you’re updating, stick with tile only in wet zones (tub/shower enclosure). For the rest, moisture-resistant drywall (green board) plus quality exhaust fans prevents mold and mildew. Paint it with bathroom-grade paint: standard interior paint absorbs humidity.
Shiplap or beadboard accents add cottage charm without breaking the budget, a single wall costs $100–$300 in materials. Seal and paint it properly to resist moisture. Avoid dark colors in small bathrooms: they shrink the visual space. Small home renovation ideas often highlight how light, reflective finishes make confined areas feel bigger.
Storage Solutions for Small Bathrooms
Storage is the secret weapon in cramped bathrooms. Mobile home bathrooms rarely have medicine cabinets or built-in shelving, so plan for it intentionally. Recessed medicine cabinets (16″ × 20″ is standard) fit between studs and provide hidden storage without eating floor space: they cost $40–$150 and install in a morning if you’re comfortable cutting drywall.
Wall-mounted open shelving works beautifully in mobile bathrooms if styled correctly. Install floating shelves (12–18 inches deep) at 12–15 inches on center using heavy-duty brackets rated for at least 25 pounds. Arrange towels, baskets, and a few decorative items to keep clutter hidden. This approach costs $80–$200 for a three-shelf setup and instantly makes the space feel intentional rather than cramped.
Over-the-toilet shelving units are practical, though they can feel intrusive in tight quarters. Choose a narrow, tall unit (no more than 20 inches wide) and stick to essential items to avoid visual noise. Corner shelves are underrated, a simple tension rod between walls above the toilet holds rolled towels neatly.
Under-sink storage often wastes valuable real estate. Add a pull-out organizer or stackable bins to make the space functional. Keep cleaning supplies and hair tools in a caddy that hangs on the wall instead of cluttering the floor. Vertical thinking, baskets on shelves, wall hooks for hair dryers, magnetic strips for bobby pins, is how small bathrooms stay organized. Home renovation ideas on a budget emphasize smart storage as a cornerstone of affordable, functional design.
Planning Your Mobile Home Bathroom Remodel
Before ordering fixtures or materials, measure your existing bathroom twice, corner to corner, ceiling to floor, and around the door swing. Mobile homes occasionally have slightly out-of-square layouts or settled floors: dimensions can surprise you. Photograph the existing setup and note plumbing locations, electrical outlets, and ventilation ductwork.
Check your local building codes. Most bathroom remodels don’t require permits in mobile homes if you’re replacing like-for-like (same fixtures, same location), but moving plumbing, adding electrical outlets, or structural changes do. Call your local building department and ask, it’s free and avoids costly mistakes.
Budget-wise, cosmetic updates (paint, fixtures, hardware, lighting) run $800–$2,500. A mid-range remodel with new vanity, flooring, and shower surround costs $3,000–$8,000. Full gutting and structural work pushes into $10,000+. Actual costs depend on material choices and whether you DIY demolition and painting. Home renovation ideas on craig-olsen.com cover both budget and premium approaches.
Order materials with a 10% buffer for cuts, mistakes, or future repairs. Schedule deliveries after measuring your doorways: some vendors won’t deliver if access is tight. Start with demolition and prep work, remove fixtures, patch holes, clean thoroughly. Good prep prevents costly redo work later.
If plumbing or electrical work is needed, hire a licensed professional. Mobile home plumbing and electrical systems are tighter and more particular than site-built homes: mistakes here lead to leaks, code violations, or insurance issues. A plumber’s time ($75–$150/hour) is money well spent for peace of mind.
Final Touches and Long-Term Maintenance
Once the major work is done, focus on finishing details that anchor the design. New grout in the tile, fresh caulk, and updated window treatments (a simple vinyl shade or small curtain rod with liner) pull the room together. Add a shower caddy, bath mat, and small rug that fit the aesthetic you’ve created, these cost little but finish the space.
Ventilation is critical in mobile bathrooms. Install a bathroom exhaust fan (with ductwork that vents outside, not into the attic) to remove humidity. Run it during and 15–20 minutes after showers to prevent mold and extend fixture life. Most fans cost $30–$100 and install in an hour if you’re comfortable with basic wiring.
For long-term durability, seal grout with a penetrating sealer annually, check caulk for cracks every few months, and wipe down shower walls weekly to prevent soap scum and mildew buildup. These habits cost nothing and prevent thousand-dollar repairs down the road.
Mobile home bathrooms are constrained spaces, but thoughtful planning and smart choices turn them into comfortable, stylish rooms you’ll enjoy using. Start with fixture and layout decisions, layer in budget-friendly cosmetic updates, and invest in ventilation and storage. The result is a bathroom that feels bigger, functions better, and adds value to your mobile home.