A kitchen island isn’t just a trendy add-on anymore, it’s the workbench of a functional kitchen. Whether you’re cramped in a galley or blessed with open space, the right island layout turns your kitchen into a hub for cooking, dining, and gathering. Before diving into materials or finishes, though, you need to understand what configuration actually works for your floor plan and how your family cooks. This guide walks through seven proven island designs that balance practicality with modern aesthetics, so you can pick one that fits your home and your actual daily routine.
Table of Contents
ToggleKey Takeaways
- A centered kitchen island requires 36 to 42 inches of clearance from counters and walls, ideally 24 to 36 inches deep and 4 to 8 feet long, working best in kitchens with at least 150 square feet of floor space.
- Waterfall edge islands create a contemporary look with vertical countertop material flowing seamlessly to the floor, but require precision fabrication and add about 12 inches to your floor footprint.
- Narrow galley-style islands (18 to 24 inches deep, 4 to 6 feet long) maximize small kitchens by maintaining proper clearance while serving as prep and storage zones rather than dining spots.
- Open shelving islands balance storage with modern aesthetics but demand organization discipline, requiring solid support like steel rods or posts every 16 to 24 inches to prevent sagging.
- Multi-level islands with varied counter heights (36 inches for work, 42 inches for seating) enable seamless conversation and prep-to-dining workflow in open-concept homes.
- Butcher block and natural material islands bring warmth and character that develop with use, but require monthly oiling and careful maintenance to prevent staining, etching, and water damage.
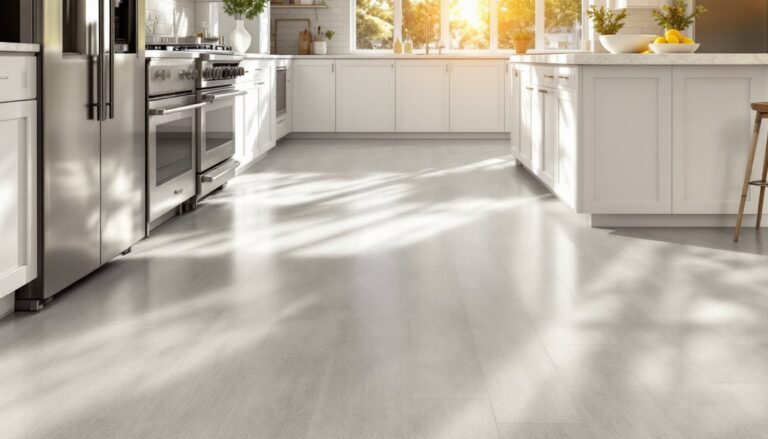
Classic Centered Island With Seating
The centered island is the workhorse of kitchen design. Place it squarely in the middle of your kitchen floor with ample clearance on all sides, ideally 36 to 42 inches from counters and walls, and you’ve got a workspace that lets two cooks move independently.
Typically 24 to 36 inches deep and 4 to 8 feet long, a centered island works best in kitchens with at least 150 square feet of floor space. Overhang a breakfast bar on one or two sides (12 to 15 inches of overhang) to add casual seating without eating prep space. Three to four bar stools tuck underneath comfortably.
This layout shines for families who cook together and need someone to sit while another preps. Add a sink or cooktop to anchor it as a true work zone, or keep it simple with just a cutting board and prep surface. If you’re not keen on centered placement, push it to one wall, you’ll gain a bit of floor room, though you lose that signature chef’s-on-all-sides feel. Permits usually aren’t needed unless you’re adding gas lines or moving plumbing, but check your local codes before finalizing placement.
Waterfall Edge Islands for Contemporary Kitchens
A waterfall edge drops the countertop material vertically down the side of the island and onto the floor in one continuous surface, usually a slab of quartz, marble, or natural stone. It’s a polished, modern move that unifies the look and creates visual drama.
Waterfall islands work beautifully with stone countertops and engineered materials. The material flows without a visible seam at the corner, so there’s no exposed edge grain or mitered joint to spoil the line. It reads as contemporary and upscale, which is why it’s been a go-to in design magazines for the past five years.
Practically, waterfall edges eat about 12 inches of floor footprint where the stone drops, and fabrication costs run higher, you’re buying more material and paying for precision cuts. The seam between the top surface and the vertical drop must be flawless: poor fabrication looks cheap fast. If you’re working with a quartz supplier or stone fabricator, ask to see samples of their waterfall details before committing. The payoff is huge in contemporary or minimalist kitchens: in farmhouse or transitional spaces, it can feel out of place.
Narrow Galley-Style Islands for Small Spaces
Got 80 square feet of kitchen floor? A narrow island isn’t a compromise, it’s smart geometry. Keep depth to 18 to 24 inches and length to 4 to 6 feet, and you maintain the magic 36-inch clearance from your perimeter counters without turning your kitchen into an obstacle course.
Narrow islands work best as prep and storage zones, not as dining spots. Yes, you could squeeze in a single row of stools, but you’ll lose legroom and it negates the whole point of a narrow footprint. Instead, outfit it with drawers, open shelving on the base, or even a built-in wine fridge. A recessed toe kick, the space between the floor and the base of cabinetry, should be 4.5 to 9 inches deep and at least 3 inches tall so you can actually stand close enough to work.
If your kitchen is part of an open-plan living space, a narrow island anchors the boundary between kitchen and living without dominating the room. Paint it a statement color or use contrasting wood, and it becomes a design feature, not just a squeezed-in afterthought. This layout doesn’t require permits unless you’re running utilities to it, which makes it a quick win for renters or those not planning a major renovation.
Open Shelving Islands for Modern Storage
Swap a solid base for open shelving and your island becomes a display piece and storage zone rolled into one. Leave the top 24 to 30 inches of the base open, supported by a frame or legs, and you’ve got room to stash cookbooks, dish sets, or decorative serving pieces in full view.
Open shelves read contemporary and airy, but they demand discipline. Dust collects, and clutter shows instantly. Designers often pair open shelving with a solid upper cabinet or floating countertop for asymmetrical interest. Style it with matching dinnerware, cookbooks standing upright, and a few plants, and it looks intentional. Pile it with takeout containers and empty jars, and it looks like a garage sale.
Structurally, shelves need solid support. Most designers use steel rods or posts at intervals of 16 to 24 inches to prevent sag. If your shelves are longer than 36 inches, you’ll want supports closer together or a thicker material, 4×6 beams look chunkier but age well, while 1×10 boards can bow. Open shelving islands work especially well in kitchen design ideas highlighted on design platforms, where visual balance is as important as storage. Budget for stronger materials and better joints: the savings you get from not building a full cabinet base disappear if you have to rebuild it in three years.
Multi-Level Islands With Breakfast Bar Height Variations
A multi-level island uses a raised bar on one side and standard counter height on the other, usually 36 inches for the work surface and 42 inches for the seating side. This hybrid handles both prep and dining without a bulky footprint.
The visual interest comes from the height shift and the overhang. Someone seated at the raised bar is at eye level with someone standing on the kitchen side, so conversations flow naturally. It’s a smart layout for open-concept homes where the kitchen opens into a living or dining area.
Build multi-level islands as two separate base units joined together, or as one island with a partial upper section. The latter costs more to fabricate and frame, but it reads seamlessly. Ensure the step between levels is no more than 4 to 6 inches, anything steeper is a stubbed-toe waiting to happen. If you’re adding a cooktop or sink to the lower level, plumbing and electrical runs must navigate the level change, which can complicate installation. Two-tier islands with a waterfall edge on the raised section look especially polished, though they demand precise fabrication. This style suits transitional and contemporary kitchens: it’s ambitious enough to feel intentional but practical enough for daily use.
Butcher Block and Natural Material Islands
Butcher block, reclaimed wood, and natural stone islands bring warmth and character that painted or stained cabinetry can struggle to match. A butcher block top, typically 1.5 to 2 inches of edge-grain hardwood like maple or walnut, feels hand-crafted and ages gracefully.
Butcher block is a working surface, not a showpiece. It’ll stain, dent, and develop a patina. Oil it monthly with food-grade mineral oil to prevent drying and cracking, and sand it lightly every year or two if you want to restore the look. Avoid sitting hot pans directly on it, and wipe spills quickly, water sitting on the surface causes swelling. It’s not a trend: it’s a commitment. If you want the look without the fuss, engineered wood with a butcher block veneer is an alternative, though it won’t develop character the same way and can’t be sanded flat if damaged.
Natural stone, marble, granite, or soapstone, adds elegance but demands upkeep. Marble stains and etches from acidic liquids: granite and soapstone are more forgiving. Many designers blend materials: butcher block for a prep surface, stone for the seating overhang. This approach is practical and visually dynamic. Storage and design sourcebooks often feature these islands because natural materials photograph beautifully and stand up to years of use. Cost varies wildly based on material grade and regional availability, so get quotes from local fabricators before committing to a design.
Conclusion
The best island is the one that fits your kitchen’s layout, your cooking habits, and your budget, not the one that looks flashiest online. Start with your floor plan and clearance needs, then choose a configuration that serves how you actually use your kitchen. Whether it’s a simple centered layout, a narrow galley solution, or a multi-level showstopper, measure twice, plan the utilities and permits upfront, and don’t skip the prep work. A well-designed island will pay dividends in functionality and resale value for years to come.